
| 일 | 월 | 화 | 수 | 목 | 금 | 토 |
|---|---|---|---|---|---|---|
| 1 | 2 | 3 | 4 | 5 | ||
| 6 | 7 | 8 | 9 | 10 | 11 | 12 |
| 13 | 14 | 15 | 16 | 17 | 18 | 19 |
| 20 | 21 | 22 | 23 | 24 | 25 | 26 |
| 27 | 28 | 29 | 30 |
- 순천디저트
- 수지 술집
- 냉동만두 추천
- 분당 맛집
- 서현역중식
- 오뚜기 라면
- 순천맛집
- CU 편의점 추천
- 서현역맛집
- 경주맛집
- 황리단길디저트
- 수원 맛집
- 서현 맛집
- 대구동성로맛집
- CU편의점 추천
- 교촌치킨 신메뉴
- 용인맛집
- 편의점 신제품
- BBQ 신메뉴
- 편스토랑
- 푸라닭
- 동성로맛집
- CU편의점
- 치킨 신메뉴
- 황리단길맛집
- 황리단길기념품
- 분당맛집
- cu 편의점
- 편의점 추천
- 마켓컬리 추천
- Today
- Total
일상 메모장
Ubuntu SSH 서버 구축 본문
안녕하세요.
오늘은 Ubuntu에 SSH 서버 구축하는 방법에 대해 포스팅하겠습니다.
Ubuntu Desktop 버전을 설치하게 되면 처음에 ssh server가 설치되어있지 않습니다.
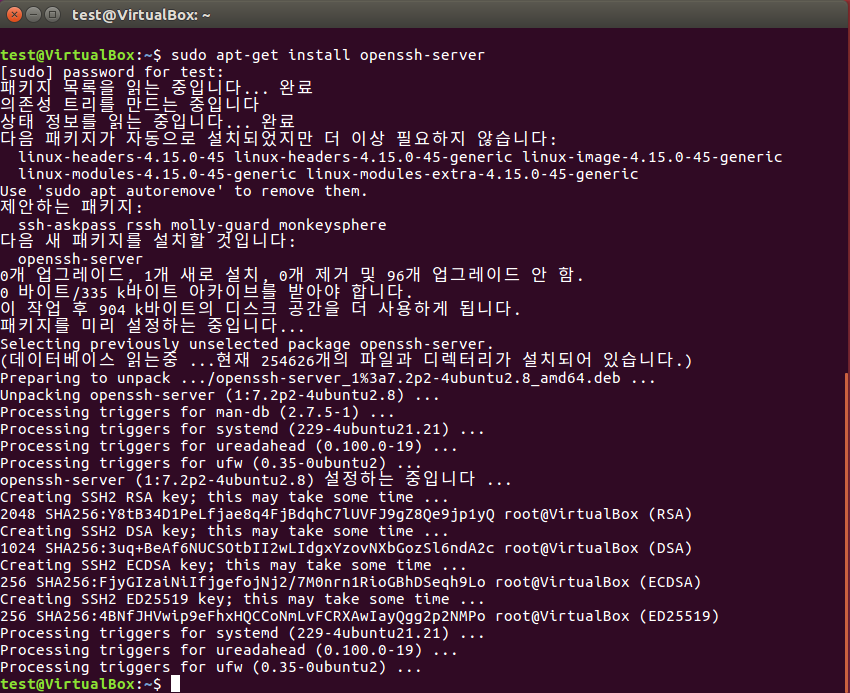
'dpkg -l | grep openssh' 명령어로 어떤 openssh 패키지가 설치되어 있는지 아래와 같이 확인합니다.

openssh server를 설치해야 하는데 apt-get 명령어를 사용하여 openssh server를 설치합니다.
이제 아래와 같이 systemctl start 명령어를 사용해서 openssh server를 실행하고,
현재 잘 동작하고 있는지 systemctl status로 확인하고,
그리고 재부팅 시 자동 실행되도록 systemctl enable 명령어를 사용합니다.

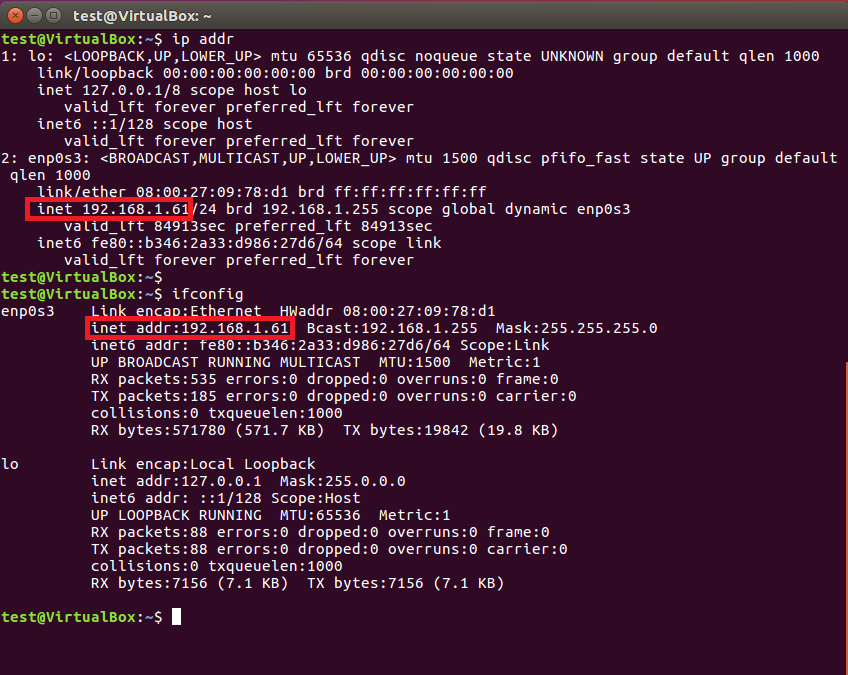
윈도우에서 ssh를 접속하기 전에 먼저 'ip addr' 명령어 또는 'ifconfig' 명령어로
Ubuntu 의 IP address 를 외워둡니다.
이제 윈도우에서 Ubuntu 에 ssh 로 접속해 보도록 하겠습니다.
접속하기 전에 putty 라는 프로그램을 아래 링크에서 다운받아서 설치합니다.
Download PuTTY - a free SSH and telnet client for Windows
Is Bitvise affiliated with PuTTY? Bitvise is not affiliated with PuTTY. We develop our SSH Server for Windows, which is compatible with PuTTY. Many PuTTY users are therefore our users as well. From time to time, they need to find the PuTTY download link. W
www.putty.org
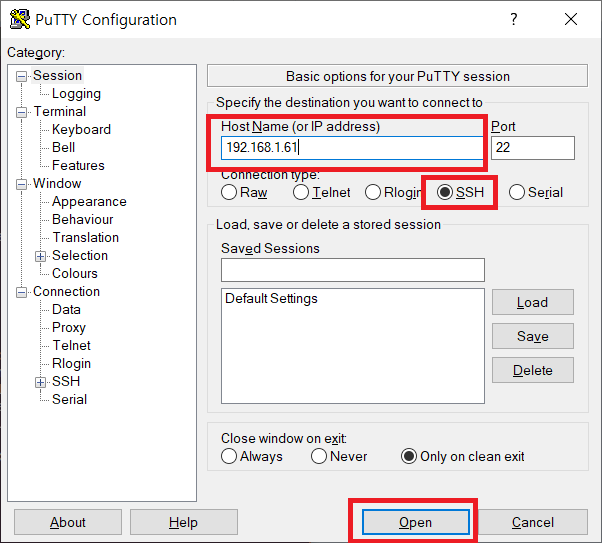
Putty 를 실행하고 좀 전에 외워두었던 Ubuntu 의 IP 주소를 입력한 후,
연결을 누르고 아이디, 패스워드를(Ubuntu 계정) 입력하면 접속됩니다.


위 그림은 접속이 완료된 모습니다.
다른 Linux에서 명령어로 ubuntu ssh 서버에 접속하려면 아래 명령어를 사용하시면 됩니다.
ssh test@192.168.1.61읽어주셔서 감사합니다.
'Linux & Windows' 카테고리의 다른 글
| VirtualBox 에 CentOS 설치하기 (0) | 2020.01.25 |
|---|---|
| 카카오 애드핏 심사 광고 보이지 않을경우 해결책 (6) | 2020.01.24 |
| Shell script(쉘) if 조건문, 조건식 (3) | 2020.01.16 |
| iperf3 사용법 (서버 클라이언트 속도측정) (0) | 2020.01.14 |
| 무료 백신 순위 종류 (4) | 2020.01.06 |


